

Defender is the built-in antivirus used in Microsoft Windows 10 and 11 operating systems. It is an excellent option for ensuring security on a home computer, but sometimes it needs to be disabled.
Why Disable the Built-in Antivirus?
Why might you need to disable Windows Defender? For example, if you are installing a cracked version of a game or program. Any bypass of license protection is perceived as an attempt to hack, and such software will simply be deleted.

Deactivating Windows Defender
The built-in antivirus of Microsoft’s operating system can be disabled in various ways. This can be temporary deactivation or complete removal. Let’s consider both options.
Temporary Deactivation
To temporarily disable the built-in antivirus of Microsoft’s operating system, follow these simple steps:
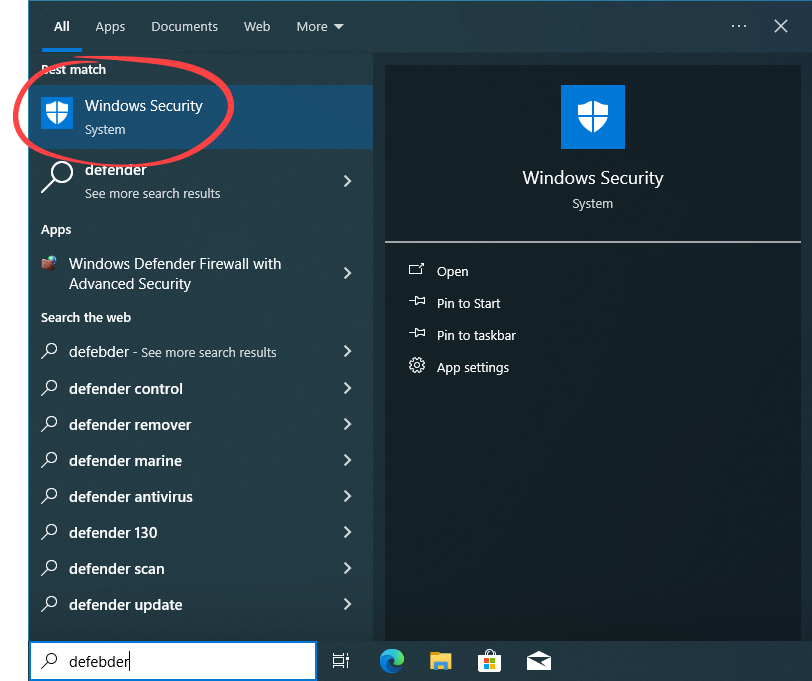
- Click the search button, type the name of the application, and select the appropriate result from the list that appears.
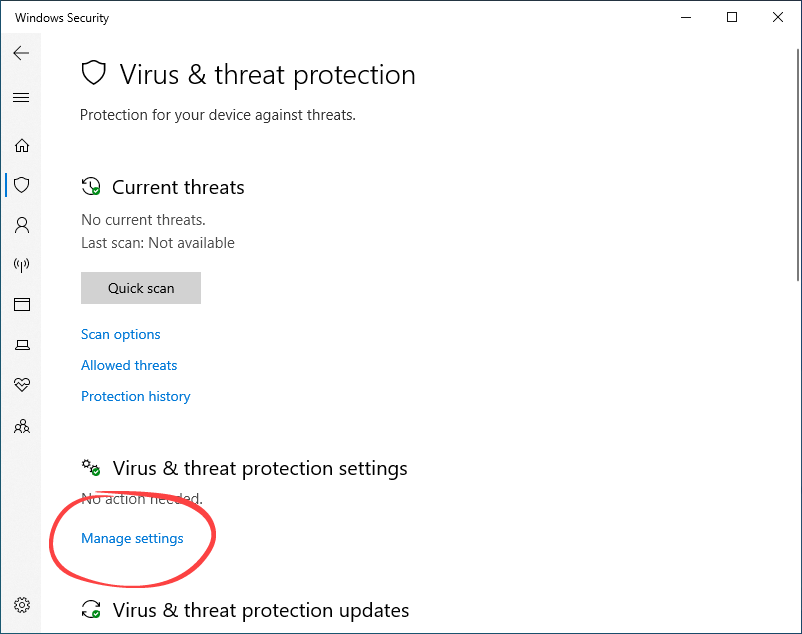
- To disable the Defender service, scroll down the window and click on the “Manage settings” link.
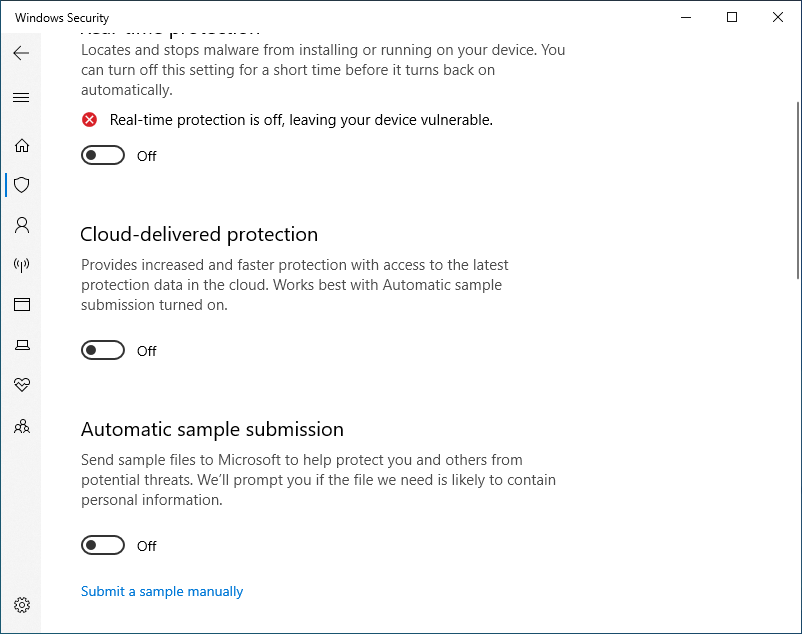
- Sequentially turn off all Defender Security Center triggers. Be sure to deactivate real-time protection.
Disabling Defender Permanently
If you need to completely disable Windows Defender for some reason, use the following instructions:
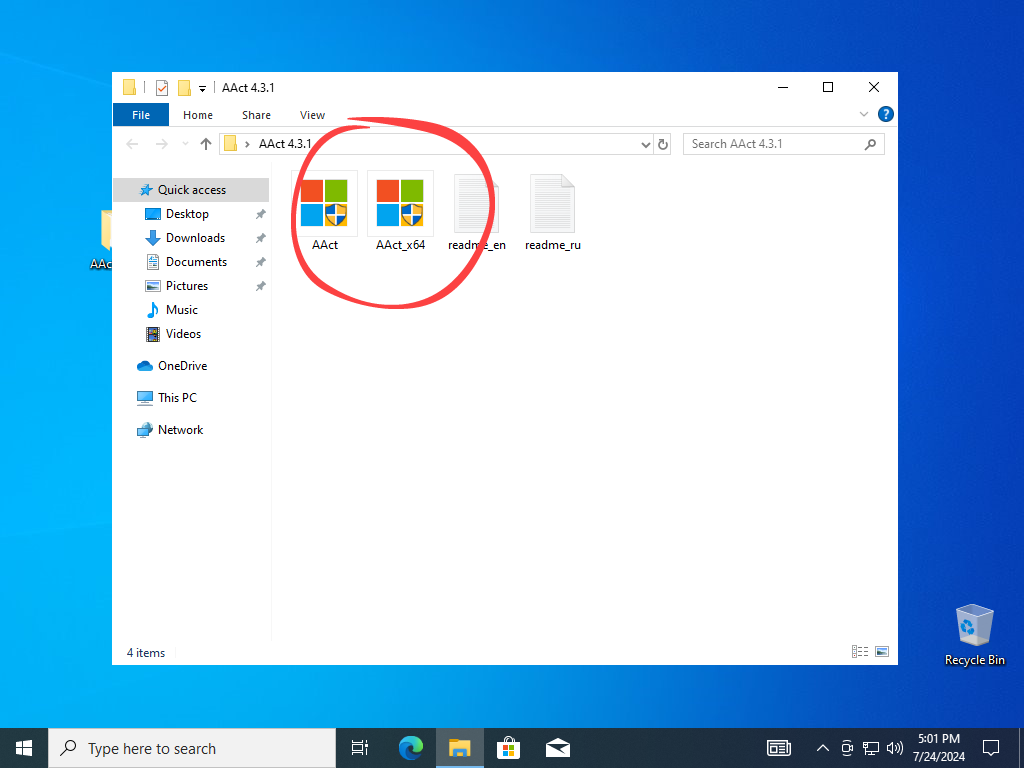
- First, download the AAct application, which will be used to disable the built-in antivirus. Extract the archive and run the version for your Windows bitness.
Archive password: 12345
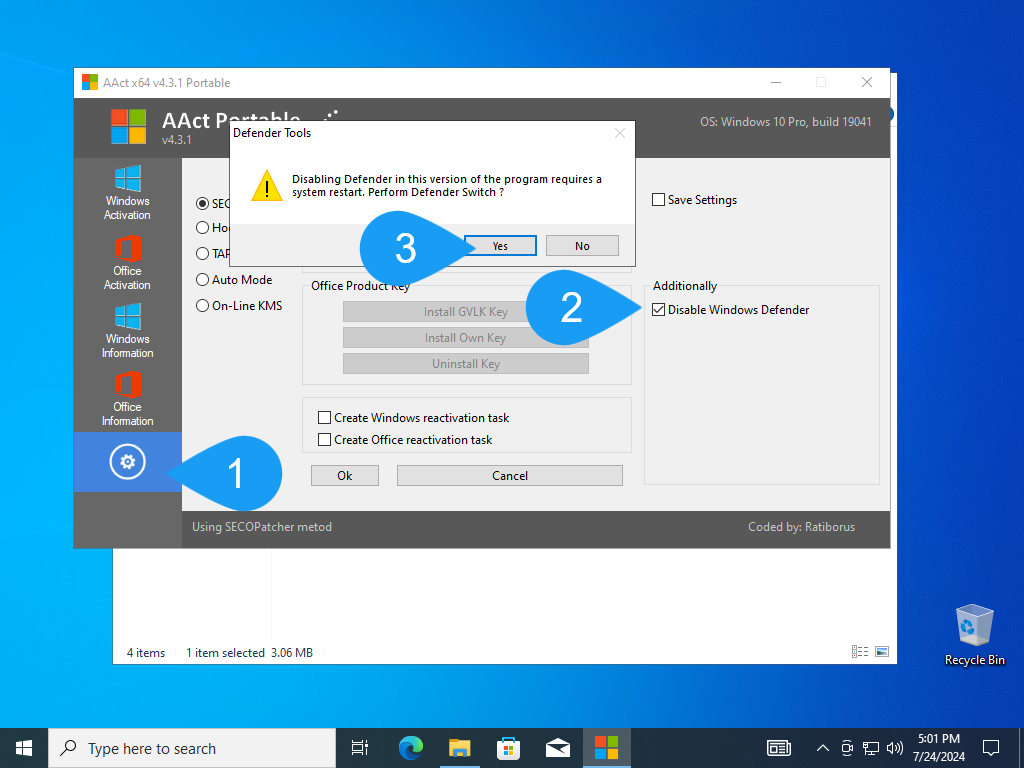
- When the program starts, select the gear icon on the left. Check the box next to the option to disable Windows Defender, then confirm your intention by clicking “Yes.”
- After this, reboot the computer using the appropriate button. Wait for the operating system to load and ensure that Windows Defender is disabled.